Send Shopify Store Data into monday.com Using Webhooks


Connecting Shopify to monday.com is a common need for e-commerce teams that want to centralize sales, fulfillment, and customer data. Many users rely on Zapier or Make to create this integration, but those tools can be expensive or unnecessarily complex for straightforward order-to-board automation. In this guide, you’ll learn how to integrate Shopify with monday.com using webhooks — no Zapier, Make, or third-party automation platforms required. By the end, you’ll have a simple setup that automatically sends Shopify orders and customer details into your monday.com boards.
HookPanda is a monday.com add-on that enables incoming webhooks directly within monday.com. Create your webhook endpoints in monday.com, and they’re instantly ready to capture Shopify events — without the need to manage external connectors.
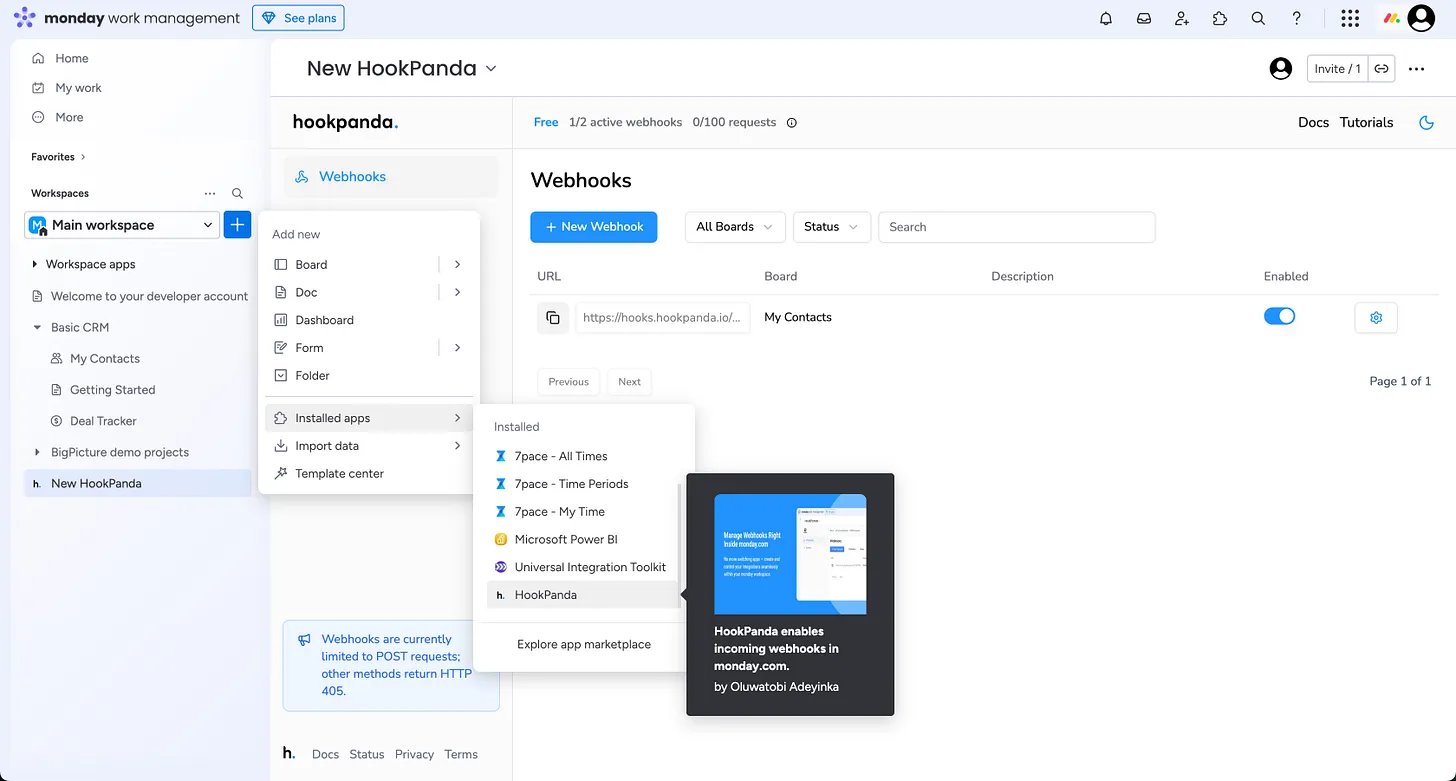
Install HookPanda on your monday.com account
You can install the app from the monday.com marketplace.
After installation, create a HookPanda board — this is where you’ll manage your webhooks. Below is a screenshot showing how to create a HookPanda board.
The first time you open the app, you will be asked to authorise HookPanda to have access to your account.
Creating your Webhook
Click the “New Webhook” button at the top of the board to open the Webhook creation drawer. Select the Workspace and the target board where you want to forward your Gravity Forms data.
I’ve created a “Shopify Demo” board in my monday.com account for this guide
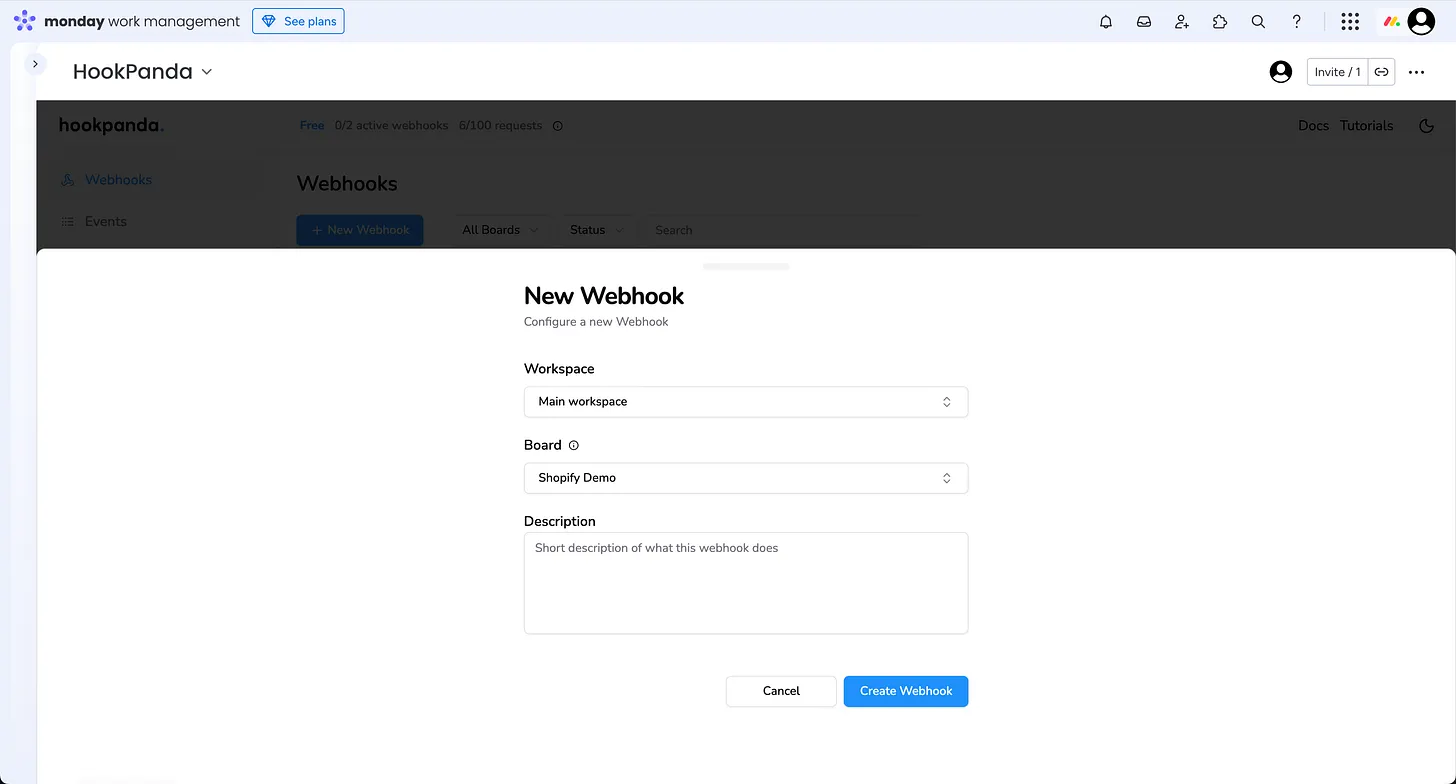
When you’re done, click the “Create Webhook” button to finalize your webhook setup.
Mapping Shopify data to Monday board columns
Shopify
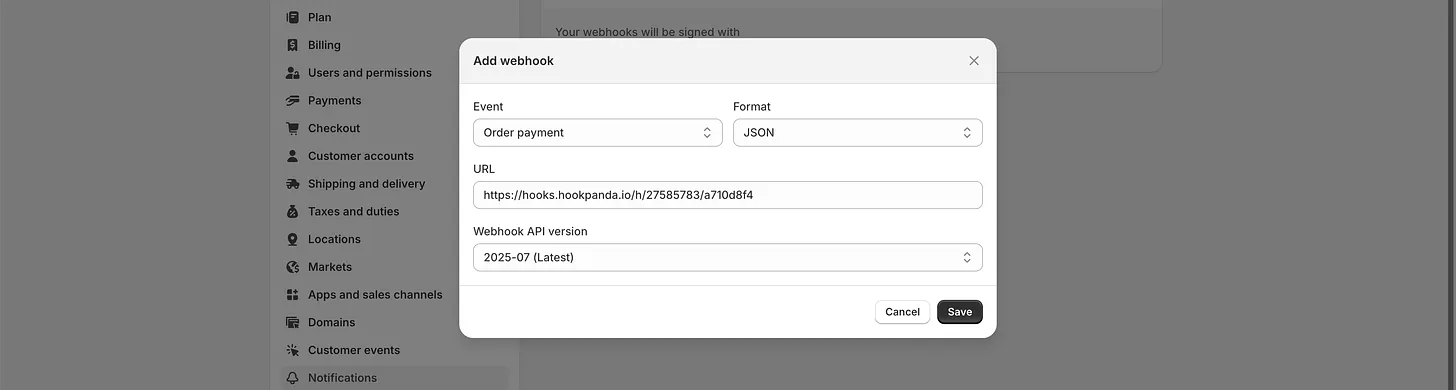
Lets start with the outgoing webhook configuration on Shopify. You can find the guide for creating Shopify webhooks here.
- From your Shopify admin, go to Settings > Notifications.
- Click Webhooks.
- Click Create webhook.
- In the Event drop-down menu, select the event that you want to trigger this webhook
- In the Format drop-down menu, choose JSON
- In the URL field, enter the URL of the HookPanda Webhook we just created on Monday. It will look something like https://hooks.hookpanda.io/{..}/{..}.
These are my settings on Shopify:
HookPanda Webhook configuration
Next, we need to map the data received from Shopify to the columns on our monday.com board.
For this tutorial, we’ll be sending the following data to monday.com:
- Order Number
- Customer First Name
- Customer Last Name
- Customer Email
Below is an example of the data as it’s posted from Shopify. Non-essential fields have been removed for clarity:
{
  "order_number": 1234,
  "customer": {
    "first_name": "John",
    "last_name": "Smith",
    "email": "[email protected]"
  }
}
Click the gear (Settings) icon next to your HookPanda webhook to open the “Manage Webhook” drawer.
The Field Mapping section is where we can map each field to it’s destination column.
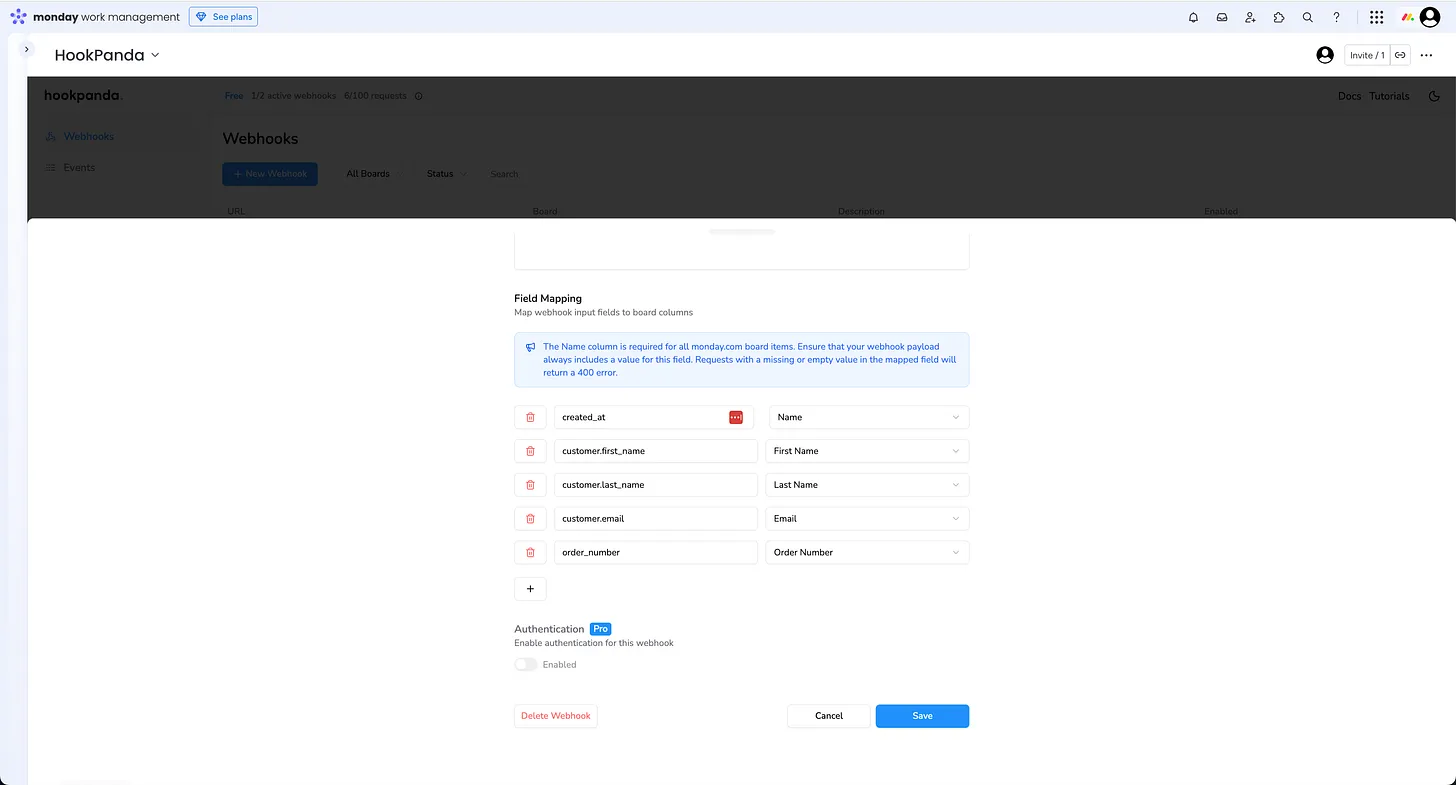
There should be an entry for each field. Nested json fields are defined using a dot(.) to represent each level of nesting. When you are done, save your changes.
Testing your Webhook
You’re now ready to test your webhook. First, confirm that the webhook is enabled — you can check this in your HookPanda board and toggle it on if needed.
With your fields mapped and the webhook active, send a test event from Shopify. The data should appear right away in your target monday.com board.
Here’s an example of an item created on the board after sending a test webhook from Shopify:

Line Items
If you’d like to add more detail to your orders in Monday — such as the individual products from a Shopify order — you can use HookPanda’s subitem mapping feature. This automatically creates a subitem in Monday for each product line item in the webhook payload, giving you a clear breakdown of every order right inside your board.