Mailchimp Webhook Integration with monday.com: Automate Marketing Workflows with HookPanda

For teams that rely on Mailchimp, keeping subscriber and campaign data in sync with monday.com is key to tracking leads and coordinating marketing. Although Zapier or Make is commonly used to achieve this, you can use also use webhooks to connect Mailchimp directly to monday.com. for a leaner setup. With this setup, new subscribers, unsubscribes, and campaign engagement flow into your boards automatically.
HookPanda makes this possible by enabling incoming webhooks directly inside monday.com. With just a few clicks, you can create webhook endpoints that capture Mailchimp events in real time and keep your workflows running smoothly.
Install HookPanda on your monday.com account
You can install the app from the monday.com marketplace.
After installation, create a HookPanda board - this is where you’ll manage your webhooks. Below is a screenshot showing how to create a HookPanda board.
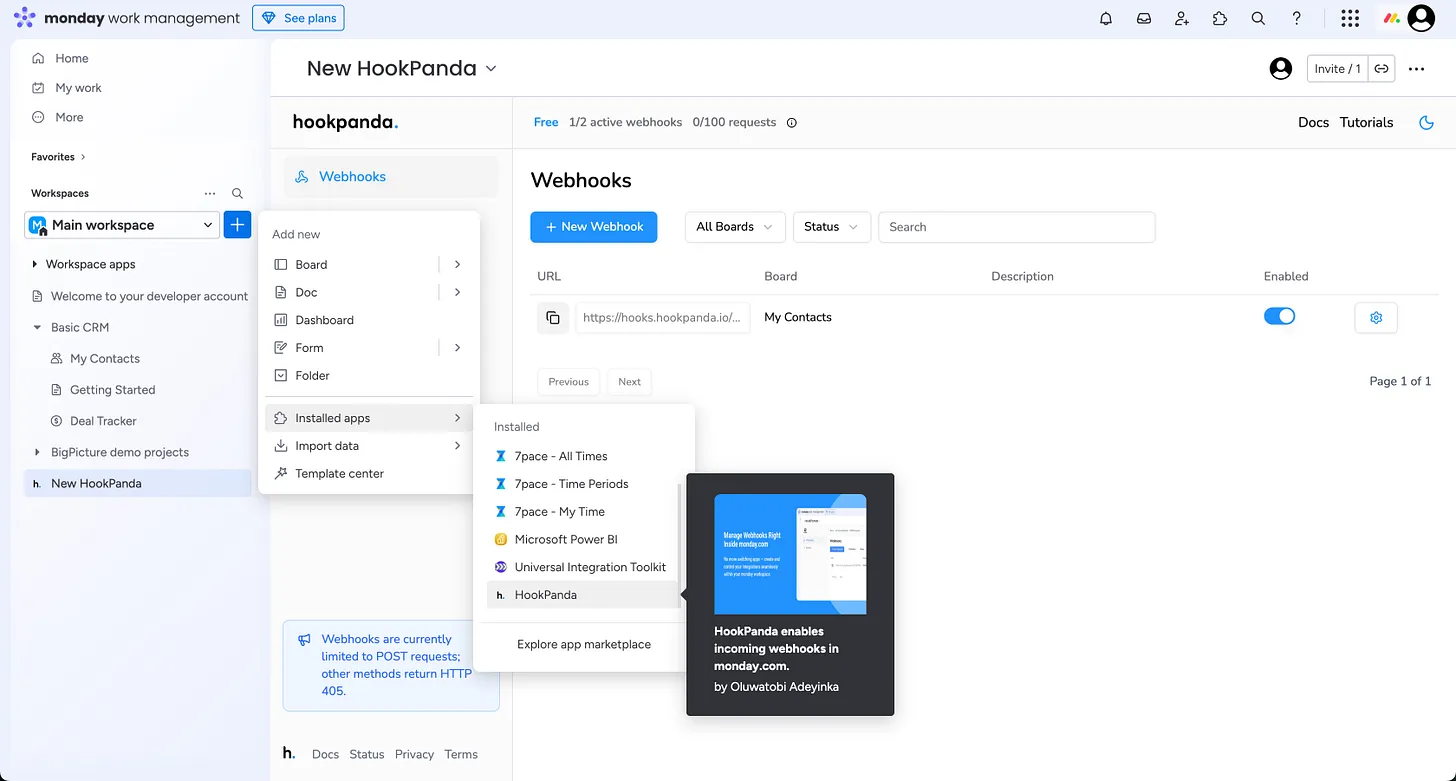
The first time you open the app, you will be asked to authorise HookPanda to have access to your account.
Creating your Webhook
Click the “New Webhook” button at the top of the board to open the Webhook creation drawer. Select the Workspace and the target board where you want to forward your Mailchimp data.
I’ve created a “Mailchimp Demo” board in my monday.com account
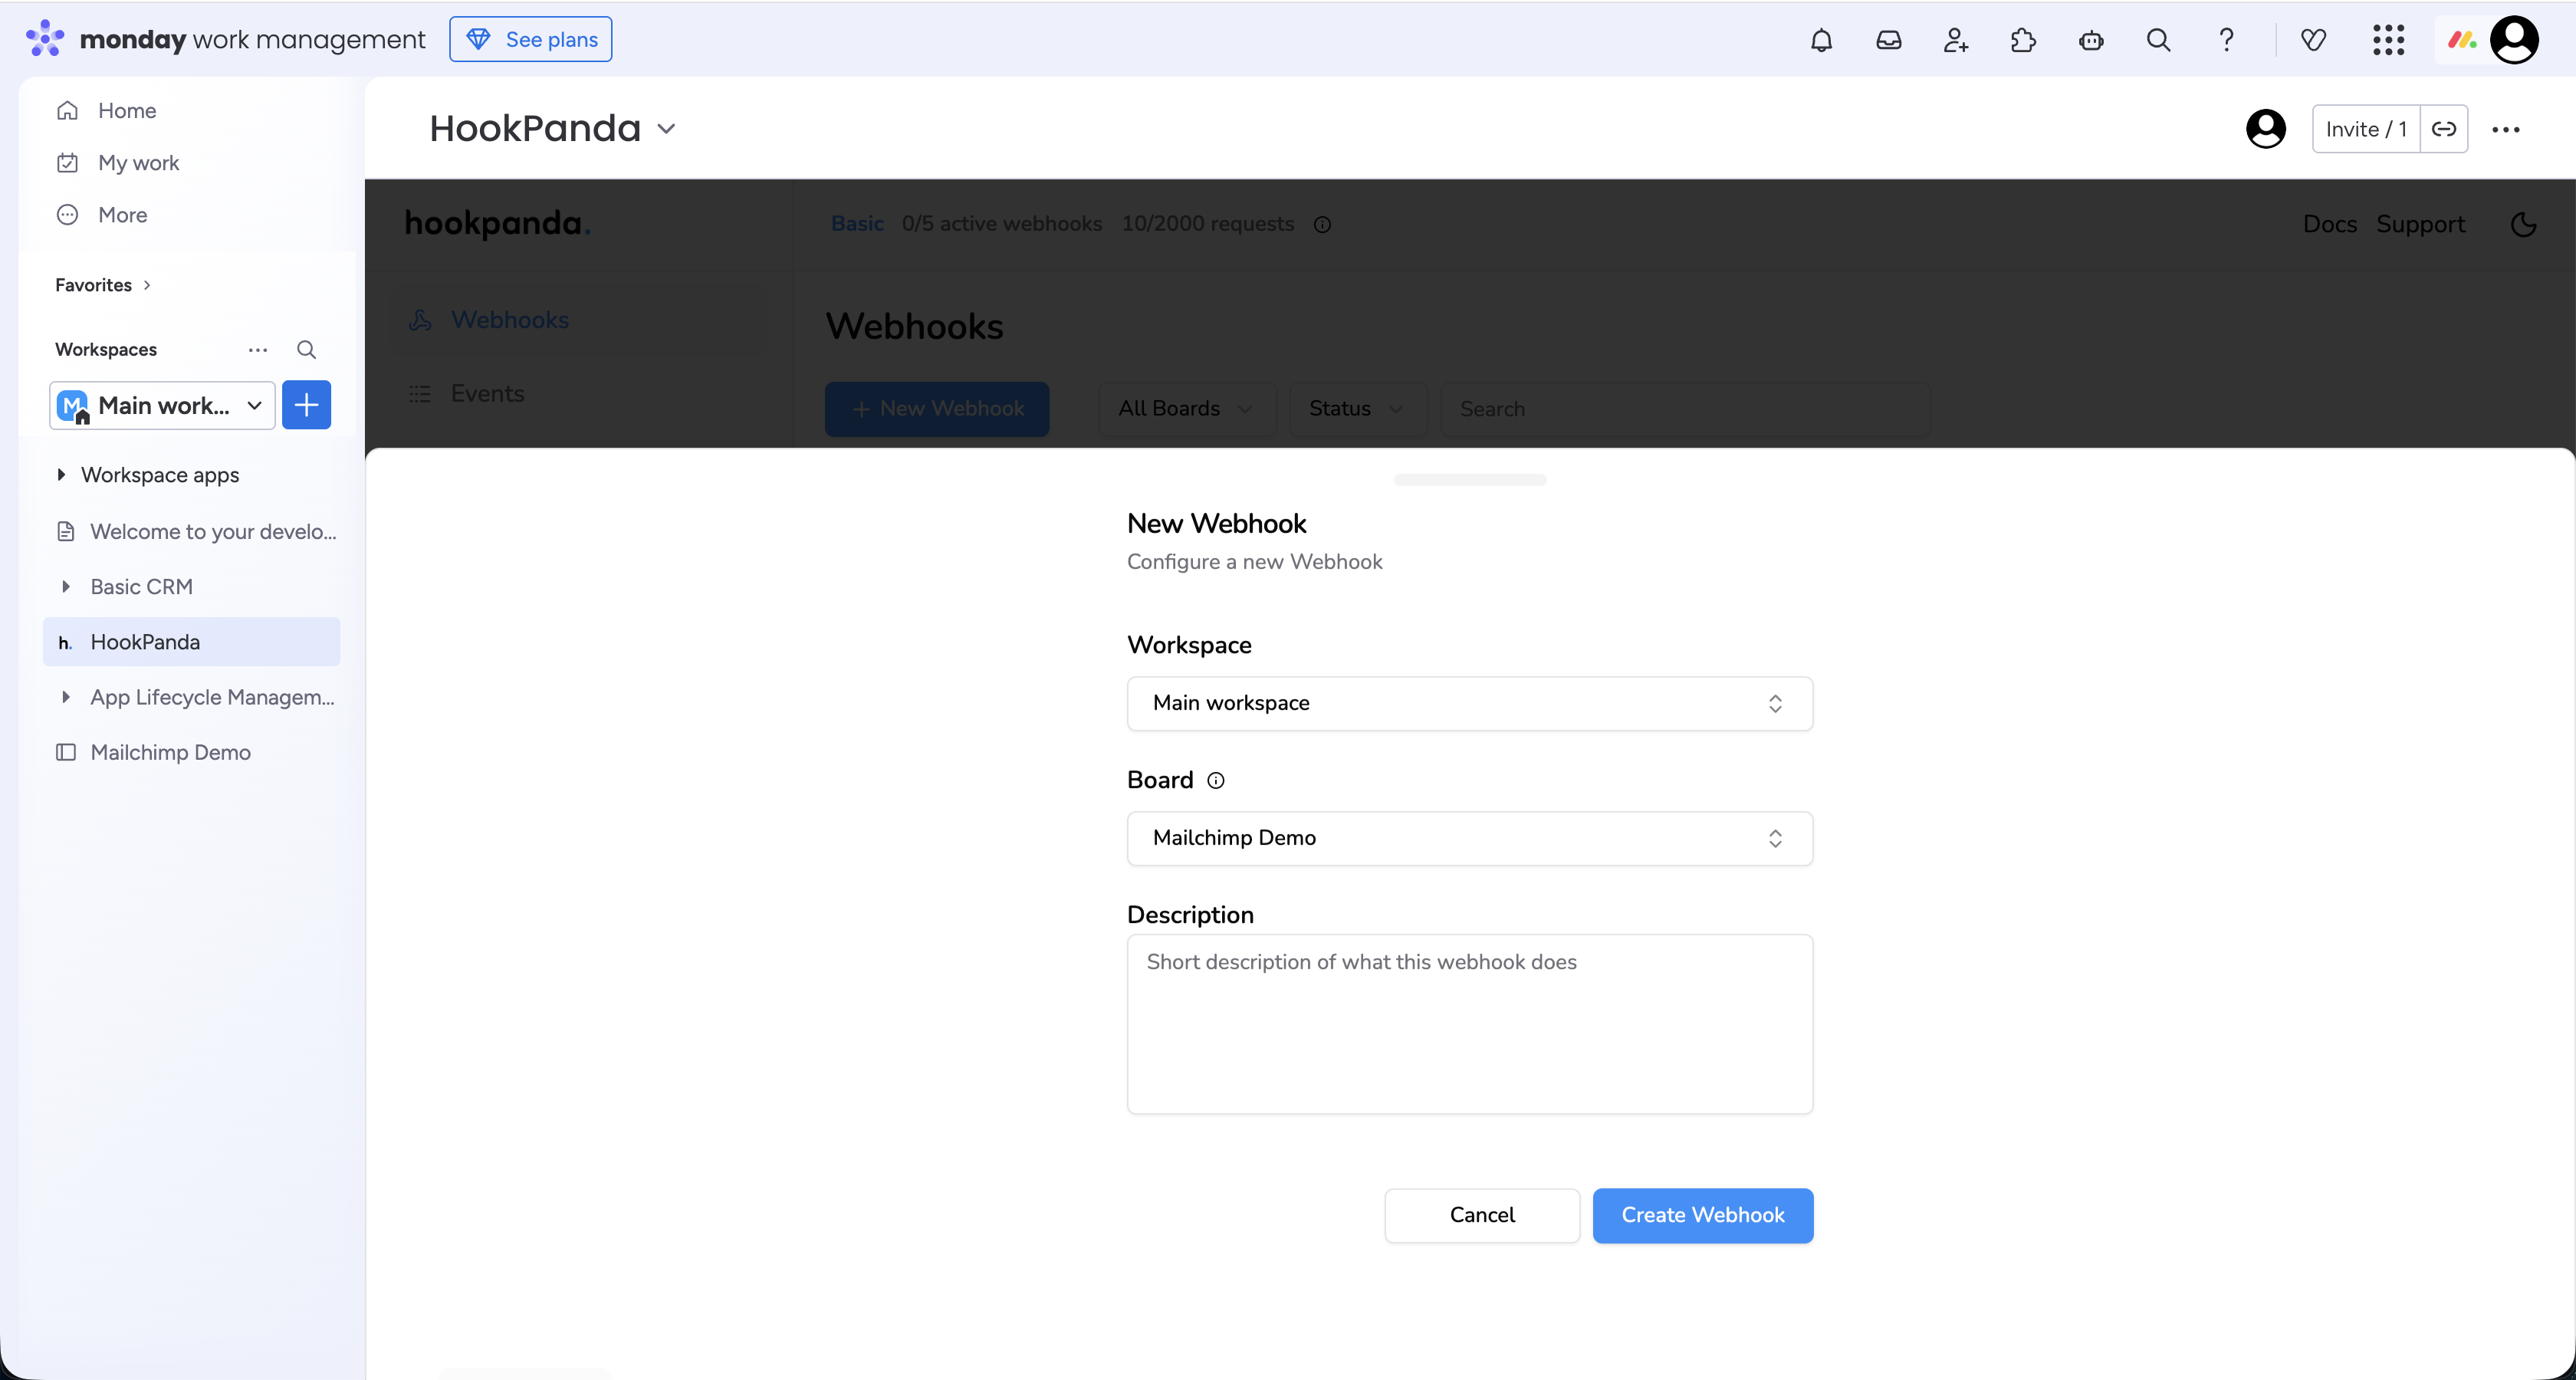
When you’re done, click the “Create Webhook” button to finalize your webhook setup.
Mapping Mailchimp data to Monday board columns
First, set up the outgoing webhook in Mailchimp by following these steps. You can find the Mailchimp documentation for creating webhooks here.
- Go to your Audience (List) → Settings → Webhooks.
- Click Create Webhook.
- Enter the callback URL. Enter the URL of the HookPanda Webhook we just created on Monday. It has the form https://hooks.hookpanda.io/{..}/{..}.
- Select which events you want to receive.
- Save the Webhook.
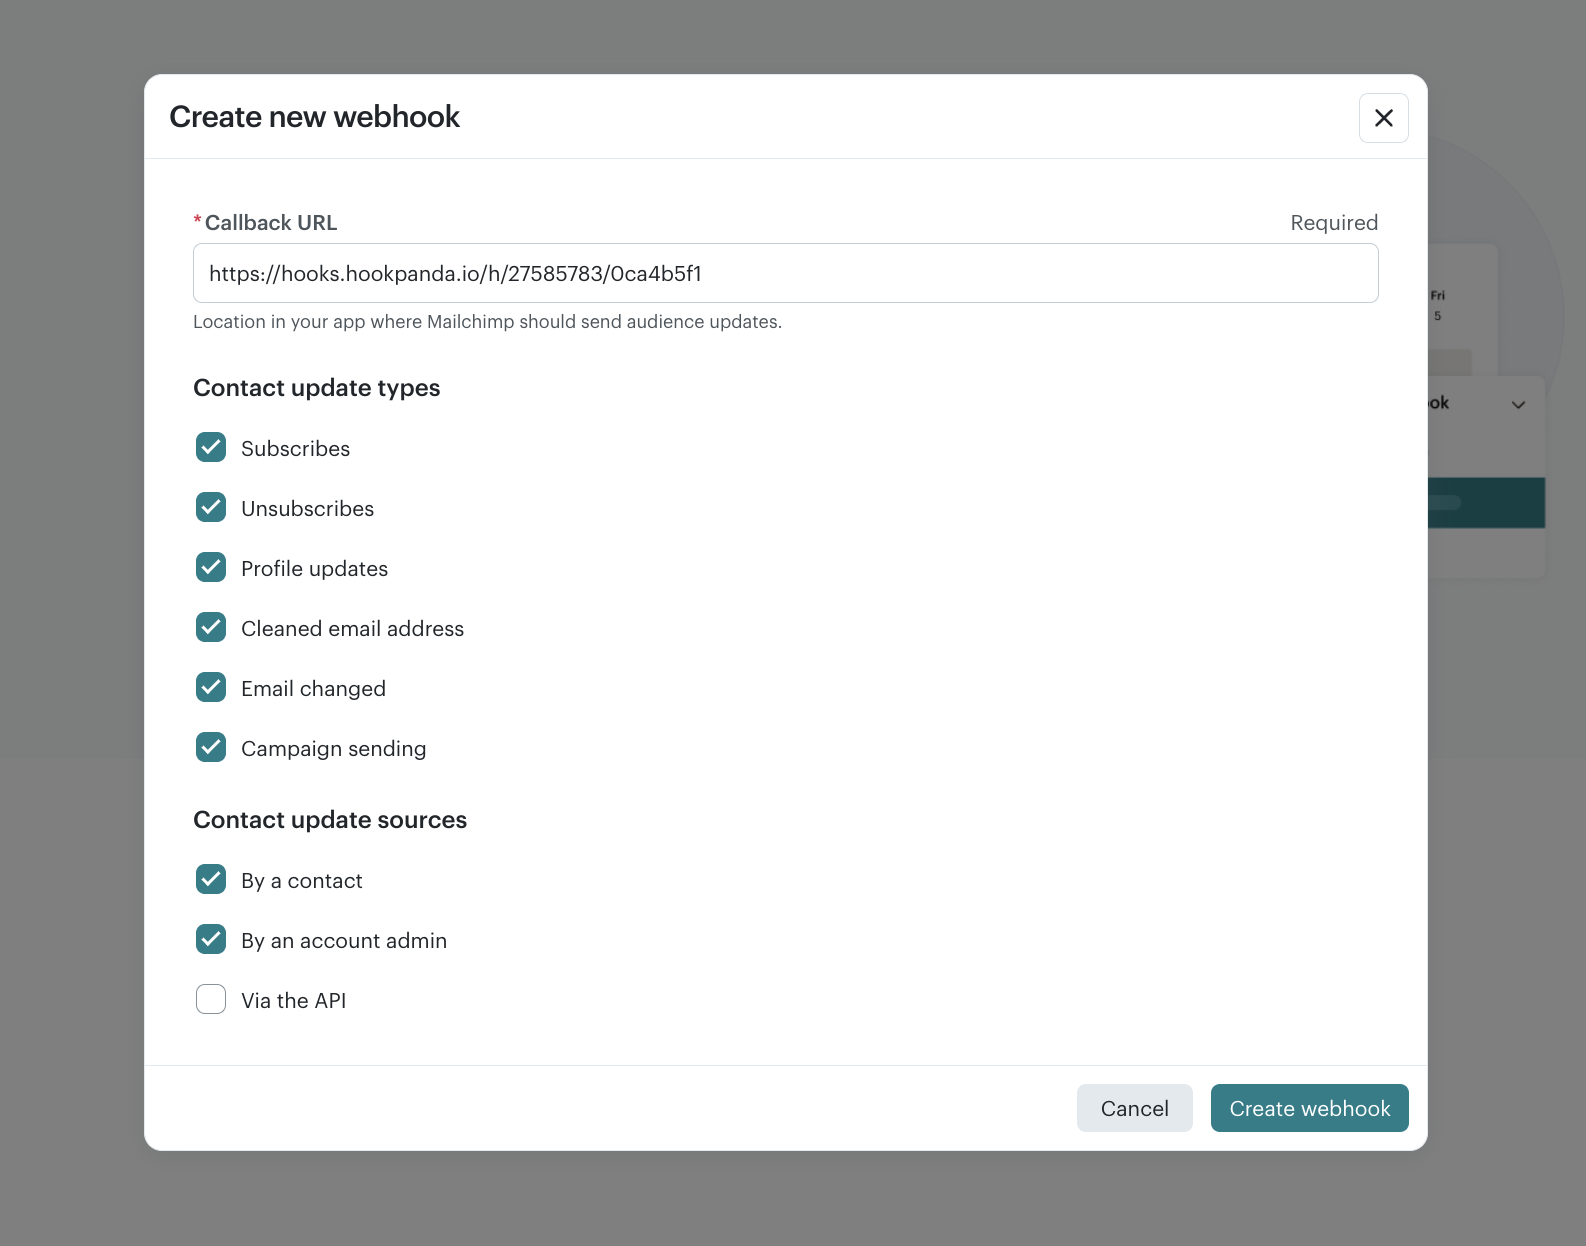
HookPanda Webhook configuration
Next, we need to map the data received from Mailchimp to the columns on our Monday board.
For this tutorial, we’ll be sending the following data to Monday:
- Subscriber first name
- Subscriber last name
- Subscriber email
We'll use the email as the item name column in Monday. Below is a schema of the data posted from Mailchimp, when a user subscription happens:
{
  "type": "subscribe",
  "fired_at": "2009-03-26 21:35:57",
  "data": {
    "id": "8a25ff1d98",
    "list_id": "a6b5da1054",
    "email": "[email protected]",
    "email_type": "html",
    "ip_opt": "10.20.10.30",
    "ip_signup": "10.20.10.30",
    "merges": {
      "EMAIL": "[email protected]",
      "FNAME": "Mailchimp",
      "LNAME": "API",
      "INTERESTS": "Group1,Group2"
    }
  }
}
Click the gear (Settings) icon next to your HookPanda webhook to open the “Manage Webhook” drawer.
The Field Mapping section is where we can map each field to it’s destination column. There should be an entry for each field. Nested json fields are defined using a dot(.) to represent each level of nesting. When you are done, save your changes.

Testing your Webhook
You’re now ready to test your webhook. Start by confirming that it’s enabled in your HookPanda board, and toggle it on if needed.
With your fields mapped and the webhook active, you can add a new user to your Mailchimp audience, which triggers the subscription event that we are now listening to through HookPanda. When the user is added, the data should be reflected on your linked monday.com board.

You can create as many board connections as needed for all the possible Mailchimp events.