How to Create a monday.com Incoming Webhook with HookPanda

Looking to send data into your monday.com boards from external apps or services? While monday.com doesn’t support incoming webhooks natively, HookPanda makes it easy to bridge that gap. In this guide, we’ll walk you through creating your first incoming webhook using HookPanda — no custom coding or complex integrations required. Whether you're connecting a CRM, ERP, or another system, HookPanda helps you push data directly into monday.com in just a few steps.
Install the HookPanda app for monday.com
To get started, install the HookPanda app from the monday.com Apps Marketplace.
Creating Your first Webhook
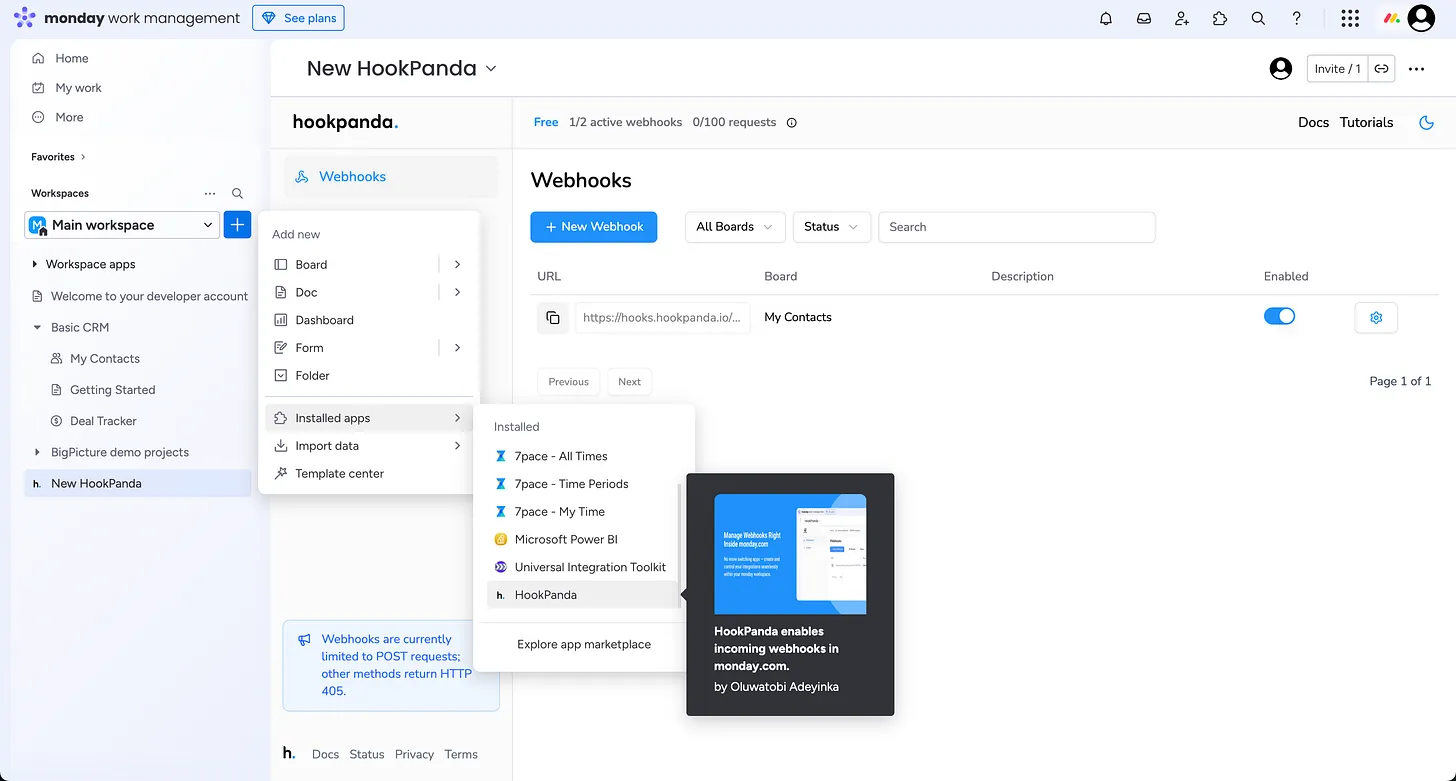
Create a HookPanda board in your workspace:
- In your monday.com workspace, go to the left-hand navigation panel
- Click the plus (+) button for creating boards
- Select Installed apps
- Select HookPanda from the list to create a HookPanda board.
This will take you to the main HookPanda interface where you can manage your webhooks. The first time you open the app, you will be asked to authorise HookPanda to have access to your account.
On the HookPanda interface, click the “Create Webhook” button at the top. This would open a drawer that contains the Webhook creation form.
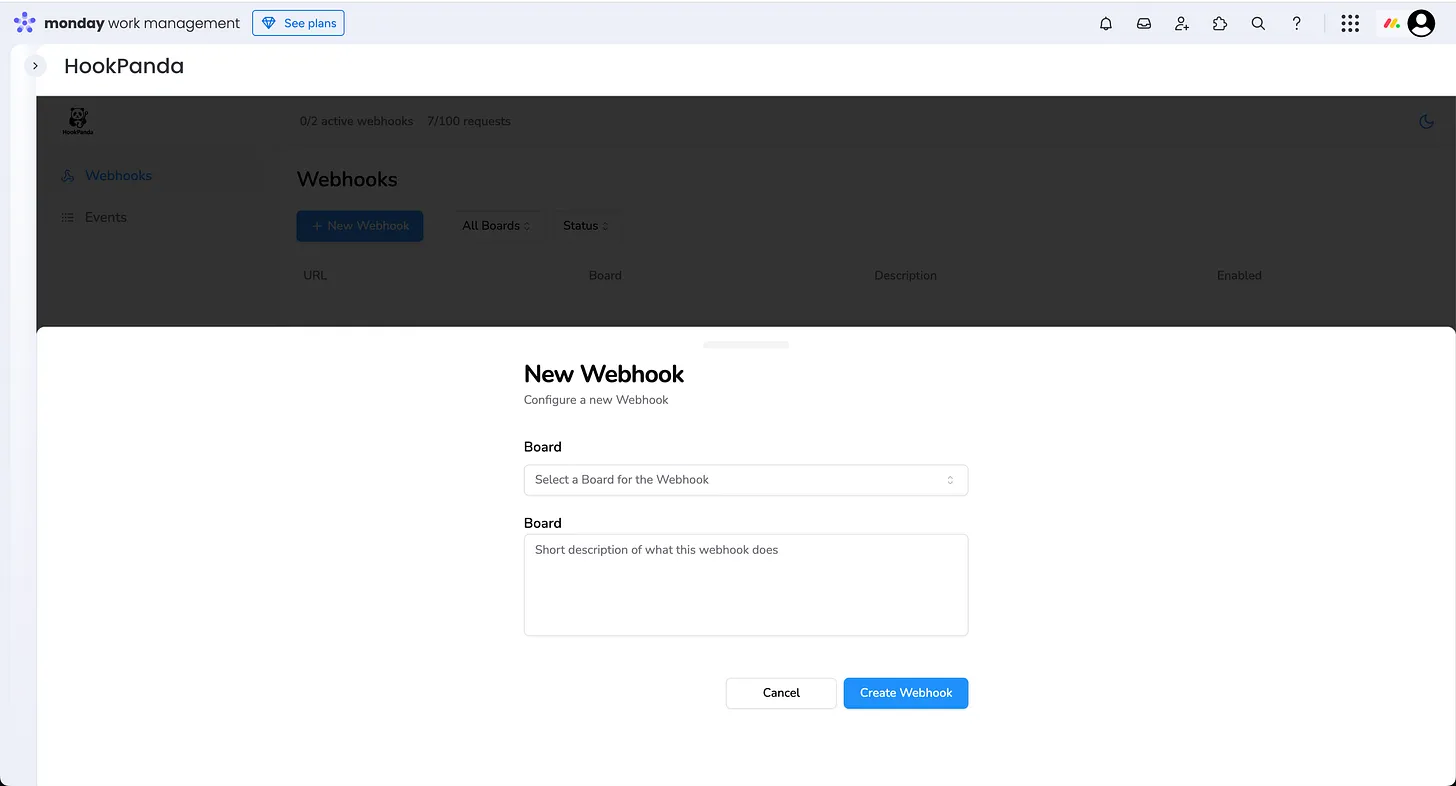
The Webhook creation form contains 2 fields:
- A dropdown to select the monday.com board you want to integrate with.
- An optional description field to note the purpose of the Webhook.
Once completed, click “Create Webhook” to finish setting it up.
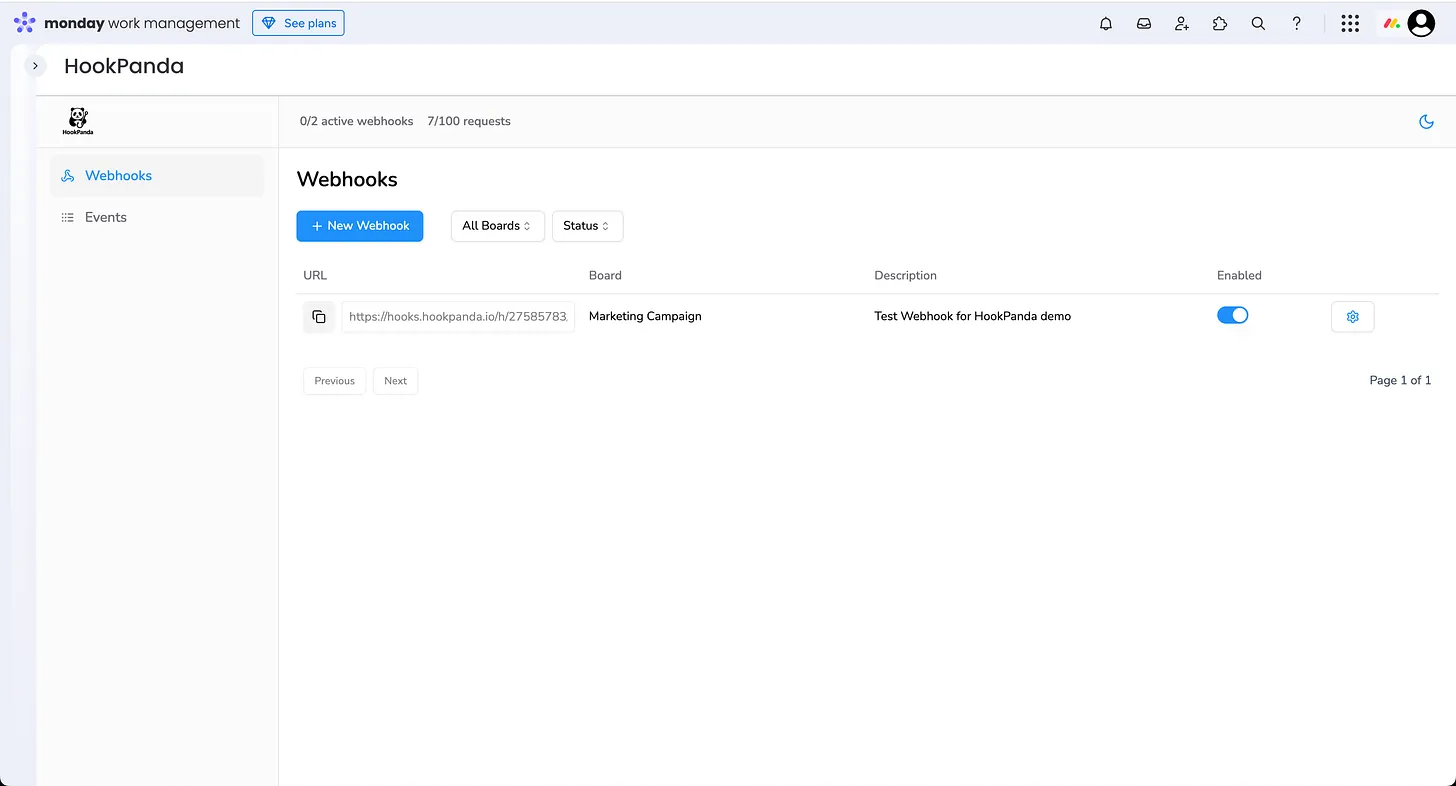
Once the webhook is created, the drawer will close automatically. You’ll now see the newly created webhook listed in the webhooks table.
The table displays the webhook URL, description, and enabled/disabled status. By default, new webhooks are created in a disabled state.
To enable the webhook, simply toggle the switch in the “Enabled” column.
Mapping Webhook Fields to Board Columns
Now that the Webhook is configured, we need to define the field mapping so it knows which board columns to map the incoming request payload to.To access the Webhook settings, click on the settings icon in the rightmost column of the table.
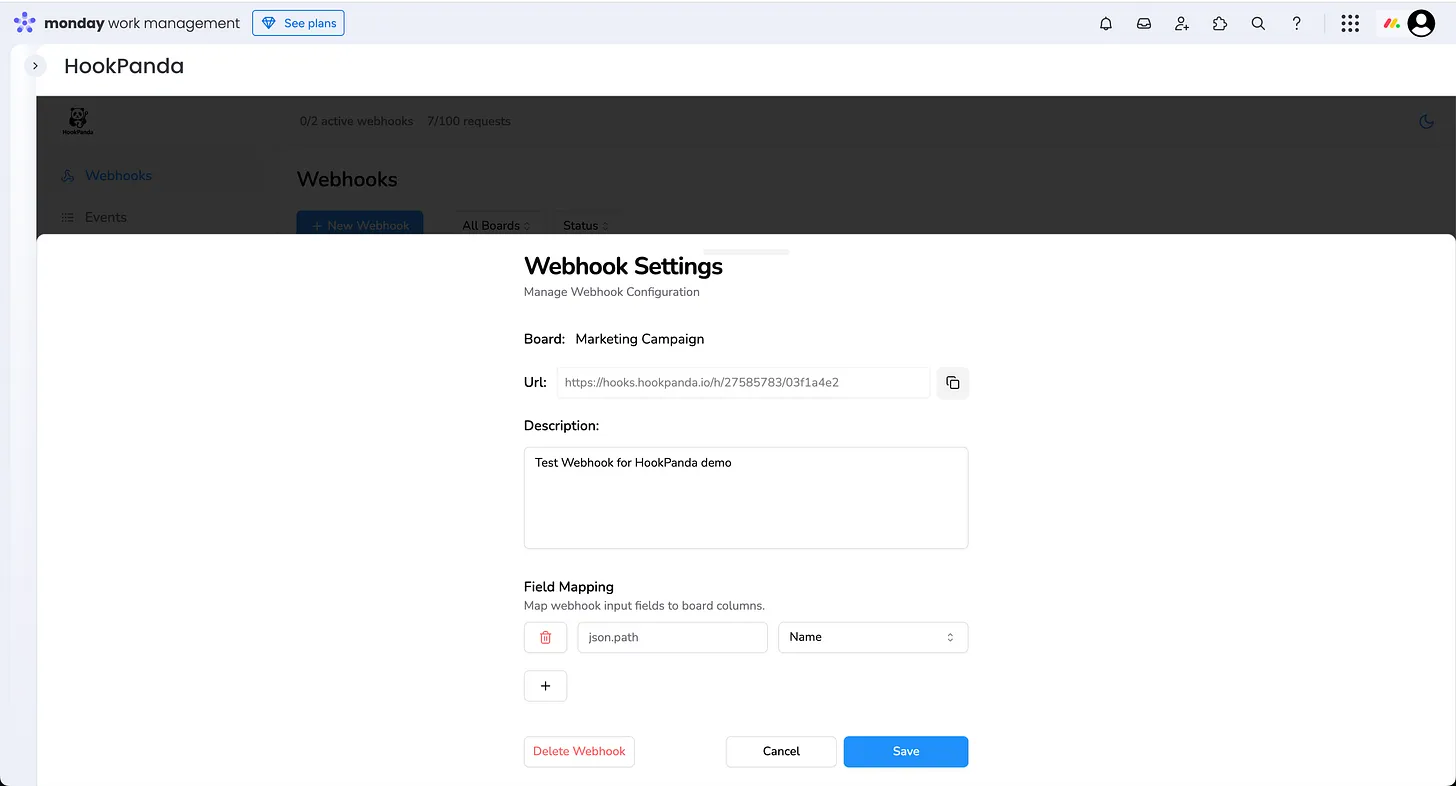
The Webhook settings drawer includes the “Field Mapping” section, which allows you to define how fields in the incoming payload map to columns on your board.
All items in monday.com are required to have a Name column, which acts like an identifier. Because of this, every Webhook must have a field mapped to the Name column.
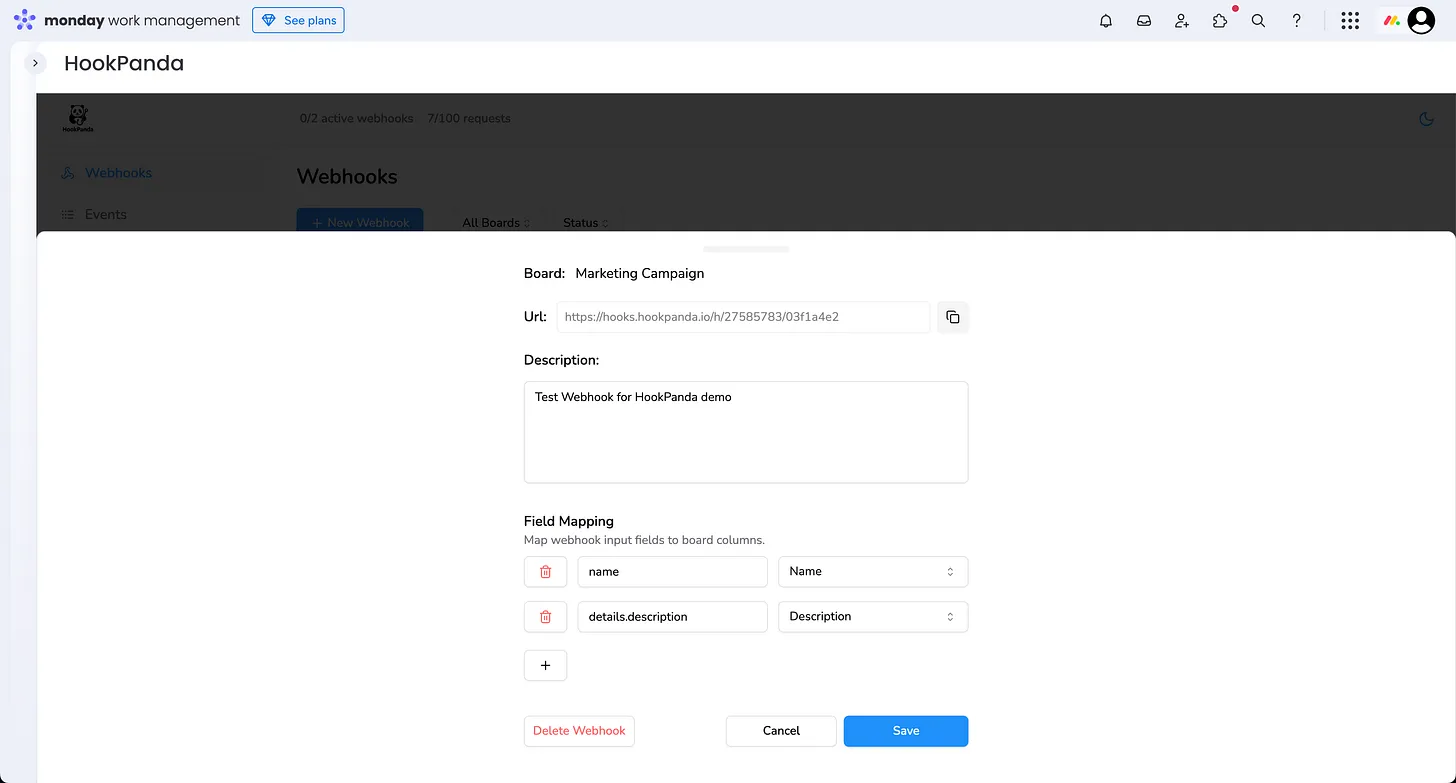
In our example, we’ll map two fields to handle the following JSON format:
{
  "name": "The National",
  "details": {
    "description": "Cool Band"
  }
}
We want to map the value of the name field to the Name column, and the value of details.description to the Description column. Here’s what our field mapping would look like:
Once all fields are mapped, click the “Save” button to apply the settings. Your webhook is now ready to ingest data into your board.
Copy your webhook URL and send a test request. Make sure the webhook is enabled— otherwise, you'll receive a 404 response.
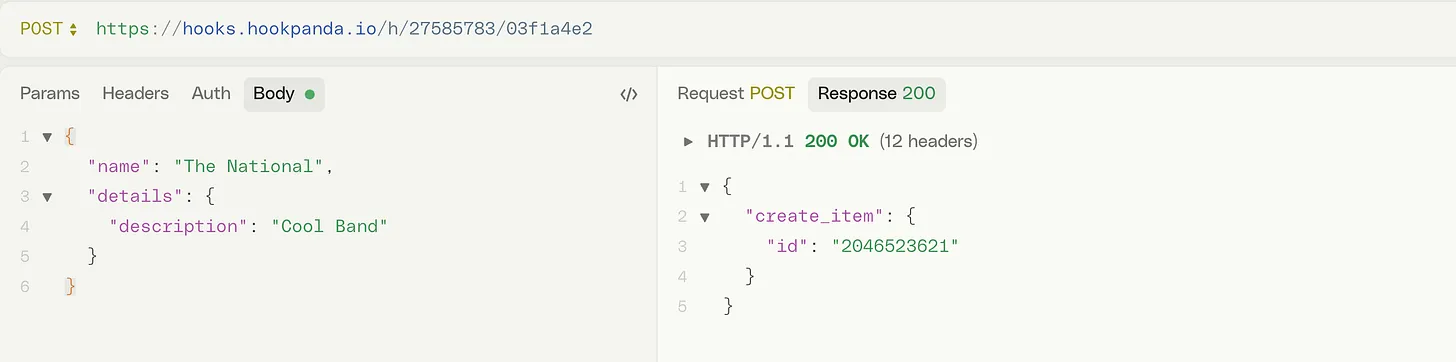
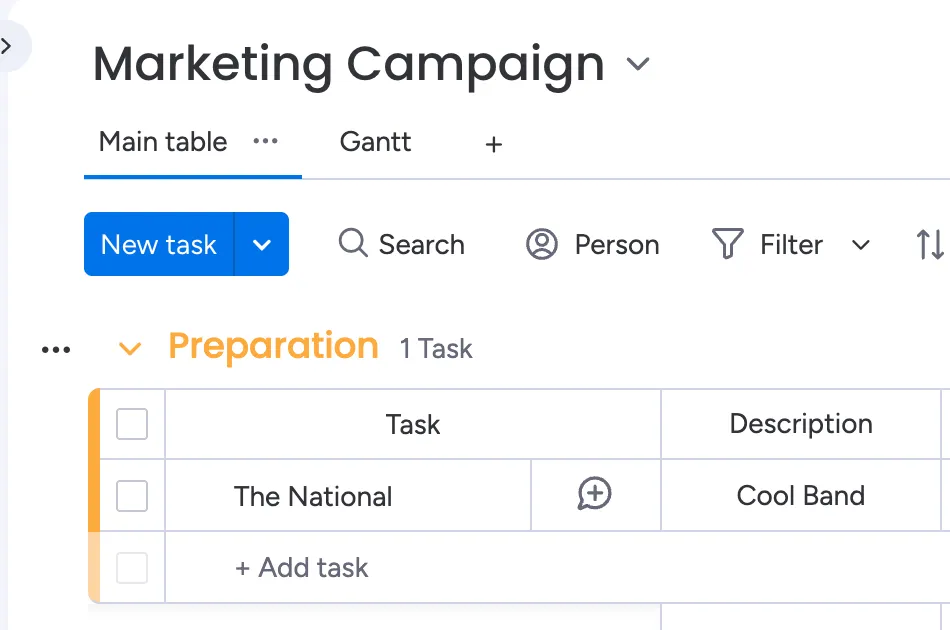
If the request is handled successfully, the webhook will return the response from the monday.com GraphQL API. You should now see the ingested data appear on your board.
That’s it — you’ve successfully set up an incoming webhook for your monday.com board using HookPanda. With your fields mapped and your webhook active, you can now start sending data from external systems directly into monday.com. If you have questions or run into issues, feel free to reach out to our support team.